Saturday, November 6, 2010

Have I stumbled on a topcoat for holographic?

I was polishing my nails with Nfu Oh #66.

As a basecoat I used Sally Hansen Hard as Nails clear. I then did two coats of Nfu Oh, and decided to put a layer of Sally Hansen over the top before putting on the last coat of Nfu Oh.
I had the idea of doing a topcoat sandwich, I ran across this method at The Polish Insomniac here.

It was no suprise when my mani went totally cloudy and dull on application of the clear coat, but what surprised me was that as it dried, it cleared up, there was little loss of the holographic effect.

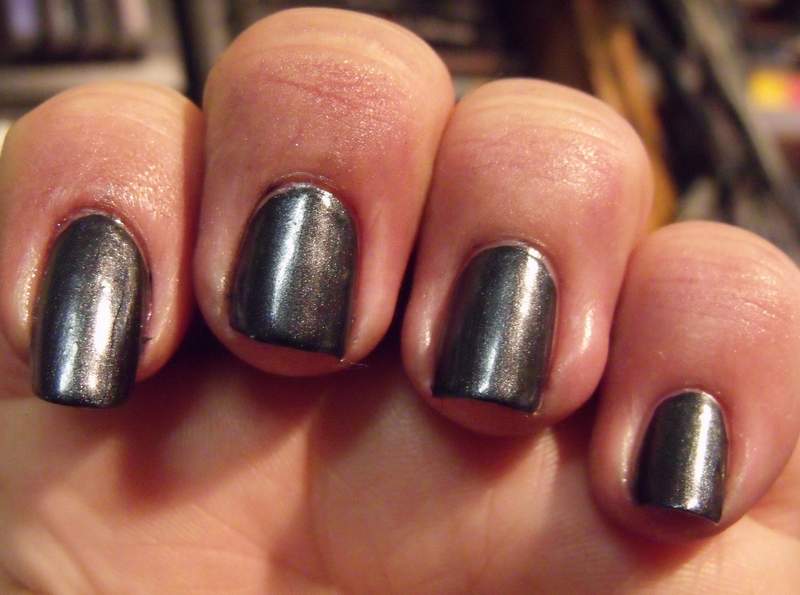
Here is a pic with Nfu Oh #66 with Sally Hansen Hard As Nails Clear over the top - of all but one nail.

Here is a more obvious shot, the nail that does not have Sally Hansen over the top is the middle finger.

I have also tried this with China Glaxe BFF from the OMG collection, and it seems to work about the same, the holographic effect is a little more subdued, but not lost.

Thursday, November 4, 2010

Blush Amour

I have finally swatched the Blush Amour polishes that I have.
Their website can be found here

The place that I found these polishes was Dimmeys. In our shop, they have a cosmetic stand right by the front door of various Blush Amour cosmetics, foundation, concealer, eyeliner, polish remover, and of course polish.
I am not sure if the pricing is consistent throughout their stores, but here the polishes retail for $2, which is the cheapest that I can find .

First up is Blush Amour #14 which is a black creme. 1 coat with top clear.


This is one coat over Nfu Oh #66.
It is extremely pigmented, and absolutely perfect for nail stamping.

Next in line is #2. 3 coats with top clear.


This is a really nice purple, although this seems to flash pink in this lighting, I do not think that the effect is this pronounced in real life. This polish is packed with shimmer and does seem to have a subtle glow.

#4 is a really nice pink. 3-4 coats with top clear.

This also has shimmer, and I have included a close up.


#6 is a very shimmery bronze. 3 coats with top clear.
This is in bright indoor lighting.

And again to show how it changes in different lighting.


#10 is one that I don't really like and hardly wear. 3 coats with top clear.


It is a nice neutral shade, but very brushstrokey.
I find that on me it shows dings quite clearly, so even after doing my nails the night before, then going to work the next morning after it has dried, this on me looks pretty bad after a few hours work.

#15 is a very bright shimmery red. 2 coats with top clear. (maybe 3?)

Another one of those polishes that seem lit from within when the light strikes them.

#46, this was about 4 coats, with no top clear.


This was a sheer neon jelly that would have required a few more coats for opacity. At 4 coast, definite visable nail line. This dried to a satin finish.

#52 3 coats - first picture no top clear, dried dull satin.


This is one of the two backup bottles that I bought of this polish.
The first bottle that I bought, I nearly used up, so I thought that I needed backups.
The backups were unlike the first bottle that I bought in that instead of drying shiny, they dried to a dullish finish.


I am not sure if it is obvious here how much a topcoat brings this polish back up to where it should be. The topcoat definitely brings up the shimmer in this polish.

#66 is a deep charcoal grey with silver shimmer. 3 coats with clear coat.


This one for me applies very well.

#69 is a bright shimmery blue. 3 coats with clear coat.


This one is also highly pigmented, and has nice shimmer.
I have found that when frankening with this polish, a little goes a long, long way.
This also will stain your nails and cuticles, so care in removing this is a must (like #14)

In all the swatches I have just used the Blush Amour clear as a topcoat, although when wearing these polishes, I always try to be sure to use a good base and topcoat to help prevent chipping.

One polish that I just realized that I didn't swatch is Blush Amour #72 which is the best white creme that I own. I will swatch that one, eventually :)


Wednesday, October 27, 2010

Continued viva La Nails

Just to wrap up, here are a few more mani's I have done from the sample pack from Viva La Nails.

Base - Sally Hansen Black Out
And another pic that shows the green flash better

Base, Nfu Oh #66

Base Cutex #98, Cherry Burst

Disclaimer - These nail art products were provided to me by the company for review.

Extremely Overdue Procastinated Post

Ok, to begin with - I haven't dropped off the face of the earth (although the enormous amount of time that has passed since I last posted, it must have seemed like it)
A fair while ago, someone posted up information that Viva La Nails had available a sample pack for bloggers, all you had to do was once you recieved your samples was to write a review and to link back to Viva La Nails.

Here is a link to where I ordered the sample pack.

I immediately signed up, and recieved the sample pack quite quickly, even considering the fact that they are based in the UK, and I am in Australia.

Here is what they sent me, which is a totally generous amount of stuff for samples.

And this is where the procrastination set in.
All this really cool stuff, what to try first, and what to do with it.

Here was my first attempt.
Wet N Wild Wild Shine Sunny Side Up


Which probably wasn't too bad (except the humongous ding on my first finger :( )
After this fail, I decided that I needed to take the time to do it properly rather than do a half-assed fail quick manicure.

Basically, that is why I haven't been blogging - I felt that my next post should have been about this, but getting started was the hardest part. Like homework or housework, it needs to be done, and once it has been done it is great, but starting it is the hardest part.

I had also been discouraged by my lack of photographic skills, I would do what I thought was a cool mani, and when I went to take pics, they came out plain awful.

I have since bought a new camera, so crappy photo's (other than operator error) are no longer an excuse.

I am still working on may lack of nail art skill though.

Here are the recent attempts to display some of the samples sent to me.
These decals looked really cool, I just couldn't decide which base colour would work well with these until I was wearing a Butter London polish (Fash Pack) that came free on the front of the Harpers Bazaar magazine a while ago.
When I first used these, I mucked up and put the image face down on my nail and dampened the back of the paper - and had the decal's blank side looking at me. I then realized that you have to dampen the paper backing, and slide the decal from the backing to your nail.
This is the first time that I have used this type of decal, and except for the misaligned one on my ring finger I am really happy with the way that these turned out.
I am particularity happy with the way that the Butter London Fash Pack compliments the colours in these decals, it looks like they were made to go together.

Two of the items that really had me stumped on what to do with them were the tiny small pale blue glass beads and the pink crushed shell.


These were fiddly. To apply, I used a toothpick with Blu-Tack on the end and used this to pick up the balls and stick them onto the topcoat.
I noticed later that when the balls are located on the coloured part of the french, it looks like they are a slightly different colour than when they are on the white, as they allow the colour to show through.


Show allThe crushed shell was another one that I hadn't a clue what to do with.
I ended up deciding that black goes with anything.
On the first three fingers I had a layer of wet topcoat, and individually placed pieces of shell with my bluetacked toothpick.
By the third nail (it was nearly midnight then) my concentration was slipping, so with my pinkie nail I had the bright idea of sticking my topcoated nail into the crushed shell.

F. A. I. L. This resulted in a thick lumpy mess, as you can see. It might have worked better if I let the topcoat partially dry before dipping my nail so that it didn't end up a thick gluggy mess, or if I had the patience to individually place each bit.

Along with the samples that I was waiting for inspiration to strike with, there were some decals that I was "saving" to use at the right time, eg, a few days off from work so that they didn't immediately get trashed (or attract the attention of the supervisor, lol)

I was particularity caught by the stickers on the top left and the top right of the picture where I show what I recieved.
As soon as I saw them, I knew that they would look stunning over black, so I was just basically waiting for the right time to use them.

So what do I do - get ready and prepare my nails with black polish - and grab the wrong decals :(

These are absolutely stunning, or they would have been, over another basecoat.
By the time that I had realized that I had grabbed toe wrong ones - I had already applied four over damp polish, so, nothing for it but to keep going.


These still came out nice, but just think how gorgeous these would have been over a deep red :(
I am still proud of myself though, this pic is absolutely no clean up. It does look a bit messy, but compared to how much clean up that I usually have to do, this is nearly perfect (for me)

Disclaimer - These nail art products were provided to me by the company for review.

Thursday, July 1, 2010

Ebay score

Every so often I browse ebay to see what polishes are available, and recently came across a listing for some Sally Hansen Magical's polish.
Here is what I wonSally Hansen Copper Cauldron, Blue Aura and Mystical Mandarin.

First up is Copper Cauldron, this photo is a bit blurry, but this is the best one that I could get to show the colour
I had to include this pic, this really shows off the size of the holo particles

Next up is Blue Aura. On my middle finger, I have swatched China Glaze 2nite.
Compared to the Blue Aura, the holo particles are smaller, and the base colour is a darker dustier blue. The Blue Aura is a lot lighter brighter blue, and to me the holo effect is a lot more flashier.
Finally is Mystical Mandarin. On my ring finger I have swatched China Glaze BFF which is a deeper pink holo.


My thoughts on Sally Hansen Magical's.
The formula was a bit tricky for me, I had to make sure that I did not apply the polish over the same spot twice, or I had problems with creating bald spots on my nails, which I had to let thoroughly dry to recoat.
Although application had to be more precise than my usual method of slap it on, the payoff was worth it. The colours are nice, and I love the way that the larger holo particles catch the light even in low light conditions.

On the China Glaze holos, they were my first love, I first saw them on a nail blog last year and h.a.d. to have them. I didn't buy the full collection, but one of the packs which included OMG, BFF, 2Nite, IDK, LOL, DV8.
Personally I have found the application on the China Glaze easier to work with than the Sally Hansen Magicals, the China Glaze for me seems to just flow on without any issues.

I am glad that I had a chance to pick up the Sally Hansen Magicals, they are the only Holos that I own other than the China Glaze, and I can see why people love them. At 9.8ml compared to the CG 14ml I wont be wearing them often, I would be more likely to wear the CG..

Surprisingly for me, my favorite CG holo turned out to be BFF, it is subtle enough for me to wear at work without feeling that it might be flashy enough to attract managements attention, but has enough sparkle to keep me entertained during the day, :)

Most Awesomest Manicure Ever!!!

So, do ya love it, like isn't it the coolest thing ever?

This is, of course, before clean up.

Now, if you have actually read this far (and haven't ran screaming for the eye bleach) I had an idea for a really cool manicure.

Now, you are going to definitely say, that either this woman is totally mad, and immediately unsubscribe never to read this lunatics blog ever again, or if you are being nice, that this mani is the biggest fail out.

But, if you are game to scroll down (I mean, what else could you see that could be worse than what you have already tried to scrub out of your memory) you will see my completed inspiration.

I really wasn't sure this would turn out as good as it did, but I am very happy with how it turned out at the end.The polishes that I used for this were BYS Island Bronze, Maybellene Colourama Electric Blue, Rimmel Forest, Cutex Cherry Burst, Jay Jays Sassy and BYS The Right Bright and the Konad plate M65

Sunday, June 27, 2010

Purple layered Konadicure


Ok, this started out as a plain manicure of BYS Mauve-In On Up, that ended up being konadded by China Glaze Lets Groove, and then, because that just wasn't enough, I topped it with Ozotics Pro 505 which is a purple duochrome with a green flash.


Look away NOW - (almost) unpolished nails alert, lol

Ok, I suppose that I had to do it sometime, bare my yellowed, flaking nails to the world.

(Well, except for a couple coats of clear, and white polish on the underside of the free edge)


Dont say I didnt warn you.......


Please excuse my middle nail being filed at an angle, it only ended up that way after the corner snapped off, and I decided that instead of loosing the length, that I would let it grow back into shape.
At the moment, my nails would not be regarded as long, but for me, this about the longest that I have managed to grow them in about the last eight years (since I have been workng as a cashier)
Since the end of March I have been using Sally Hansens Miracle Cure, and it does seem to help with the peeling flaking nails, although it has not totally prevented it, as you can see.
At the moment I am toying around with painting the underside of my nails white, to see if this helps , as well as to give the effect of a more natural manicure when using sheer polishes.

Sunday, June 6, 2010

Various Swatches

First up is Sally Hansen Gunmetal, I think that this was about two coats. This has a slight shimmer, and self levels nicely.


This polish is by NYC, Molten Metal. This pic was taken indoors under a desklamp. This shows how well that this polish shines up under lower light conditions.


This polish is by Wet N' Wild, Crystalic. I love this polish, it is a black, with a glass fleck shimmer. This is without topcoat and it has a beautiful shine.


This polish is by Sally Hansen, Nonstop Nude. From memory, this was about three coats. Personally, I did not like the application on this one, the polish seemed a bit "gloopy", and I had bubbling problems. I might be able to fix this with some polish thinner, but as yet, I haven't bothered yet.


This polish is by Wet N' Wild, Wild Shine - Wild Orchid I think. From memory, this was three or four coats. This is another polish that I love, it is a beautiful shade, and I love the holographic glitter in this one. To begin with this polish seemed pretty sheer, but it really is worth building up, or layering over another purple polish.


This polish is by Wet N' Wild, Wild Shine - Carribbean Frost. As you can see, this polish shows up all the flaws on my nails, but this could be easily corrected by a topcoat. I think that this was about two coats. This has a lovely microshimmer.

All of these polishes are ones that I recieved from Lissa from Lissa's Nails from when she was destashing.

I do have some more to post up when I get time.

I would just like to thank Lissa for the opportunity to try some polishes that I can't obtain in Australia easily.

Wednesday, April 21, 2010

Australian Magazine Samples

Hi all, this is primarily a nail blog, but I thought that I would mention some samples that are with the current issues of two magazines at the moment.
I purchased my magazines from Coles, but I do not know if they are excusively there.
The current edition of Marie Claire comes with a free goodie bag, and what made me take notice was the free sample of Batiste dry shampoo that Noveau Cheap mentions in her blog.


I paid $8.20 for the magazine and sample bag (primarily for the sample bag because I don't usually buy magazines). Although I haven't tried out the products yet I think that I definately got my money's worth.
I definitely intend trying out the Herbal Esscences long term relationship conditioner for long hair with a fusion of Red Rasberry.

This comes in a sample size of 60 ml which wont last me long at all as my hair is fairly long so I use a fair amount of shampoo and conditioner.
I have already had a sniff, and it smells nice, so I can't wait to use this.

The other magazine that I also purchased purely for the product was Grazia.
This comes with a free benefit eye brightener worth $39. The price I paid for the magazine was $6.00.


After the day that I had today, my under-eye area definitely needed all the help that it could get.
I tried this product underneath one eye nearly as soon as I got home. I left it for a bit, and didn't see any difference, so tried another application as the leaflet recommended.
Whether it was user error, or it just doesn't work for me I am not sure, but I didn't see any noticeable difference, but also in saying that, I have very pronounced dark circles under my eyes normally.
The product comes in clear tube with an applicator wand , and the product colour is the pale pink
as pictured.
Also, looking at the promo shot, in my opinion it looks like the model pictured in the before shot has no makeup on, and in the after shot, it looks like she is wearing makeup, so whether this stuff would work better under makeup I have no idea because I haven't tried it like that yet.

I do feel like I have got my money's worth out of these two magazines (the Marie Claire also has a car ad in it with a supplied set of 3D glasses, so guess who was like a kid and had to look up 3D pics on the internet, lol), as I feel like it was a cheap way to try out products that I wouldn't have bothered buying by themselves.

Wednesday, April 14, 2010

Loreal LA Collection Crystals

Hi, here I have for you today Loreal LA Collection Crystals in #200.
I can't find out much about this on the net, but it was made in France.
I purchased this at the Reject Shop . I first saw it there for $5AU, but even though I liked the colour, that was too much for me to spend on a 6ml bottle. I passed the rack one day and it was down to $2Au, which meant that it very quickly became mine (plus a backup bottle, lol)
This is a great shade, although it probably doesn't look like it, it applies well, and this is only two coats without topcoat.

This photo, the two middle fingers show the colour when shaded.

This one shows how well this sparkles up in sunlight.
The shimmer in this seems to show up well indoors, but really comes to life in sunlight.


Last picture, the reason that I hardly slept last night


And our other family menber who is wondering what noisy little thing has invaded her life.